
Installing PostgreSQL natively in OS X for use by PokerTracker 3 running in a Parallels virtual machine.
That sure seems like a lot of work. Just writing it out was exhausting.
And really, what’s the point? Pokertracker.com already has a link where I can download PT3 and PostgreSQL together and install them both in one fell swoop.
I’ll give you two very good reasons. First, it’ll run faster. And second, it’ll run faster.
Running Windows in emulation means you’re taking a significant hit in performance right off the bat. Even if you’re rocking a top of the line Mac Pro with tons of RAM, there’s a guy in an East Bumfuck trailer park whose $400 shitbox PC is running Windows faster than you.
Ain’t nothing you can do about it. But if you can ease the load on your virtual machine as much as possible by offloading a lot of the heavy lifting to your OS X machine, you won’t be at such a disadvantage. And by storing your databases on the Mac side of your machine, you won’t be filling up your tiny Parallels C: drive.
So let’s get started.
Download and install PostgreSQL for Mac. The website is, not surprisingly, postgresqlformac.com.
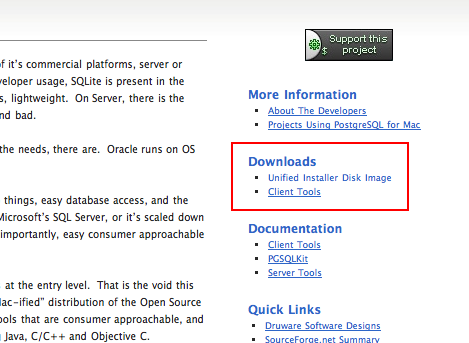
Under Downloads, click on Unified Installer Disk Image, then click on PostgreSQL Unified Installer 8.3.5.
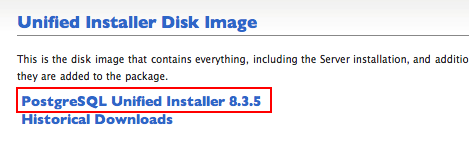
When you open the disk image, this is what you’ll see.

The installer you want is in the Server folder. Open the installer. If you click on Customize Install, you can see what’s going where.
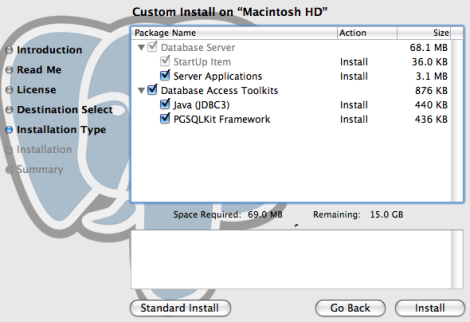
To be safe, just go with a Standard Install. Enter your admin password (can’t do this without it), and away you go.
Okay, PostgreSQL is now installed on your machine. Now, let’s tell PokerTracker 3 to use it instead of the Windows version.
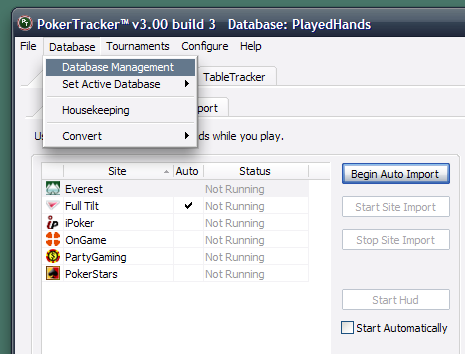
Start up your Parallels virtual machine and start PokerTracker 3.
Once you’re all loaded up, go to Database Management.
Select the database you want to edit and click Edit.
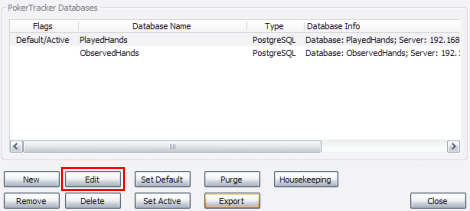
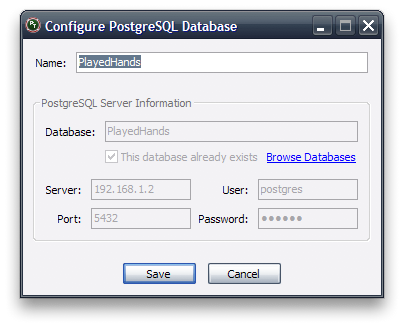
What’s this? Everything’s greyed out! That’s because PT3 will not let you edit an active database. Make sure you set another database as active before you try to edit.
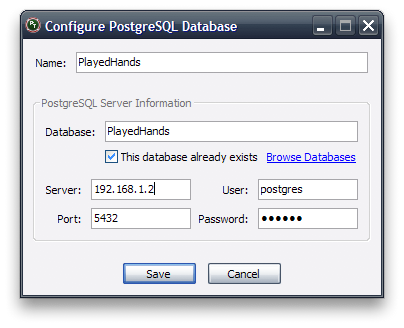
Ah, that’s better. Change Server from “localhost” to your Mac’s IP address on your network.
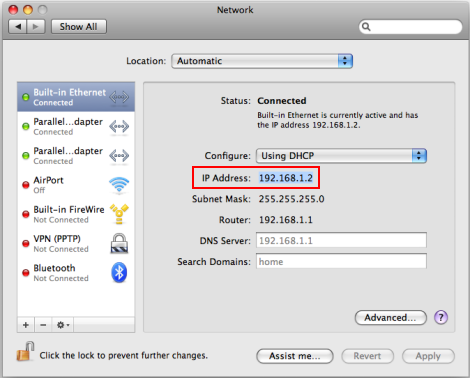
Don’t know what your Mac’s IP address is? In OS X, open System Preferences > Network. Here, my Mac’s IP address is 192.168.1.2.
Super. Now all you need to do is to get your hands out of your original Windows-bound database and into your new Macified one. There are several ways to do this, but I find the easiest way is to export the hands from the databases you want to use and then import those files into your new database.
And that’s it. Hopefully it’ll work as well for you as it has for me.
This article was written by Michael Buss exclusively for Mac Poker.